This is the first intermediate guide posted to cover all things formatting. Find all the available guides here.
Formatting 101
In this guide you will find tips and tricks regarding formatting to take full advantage of how Discord parses text, embeds and pings. Use these features to your advantage when writing resources, official announcements and other news. For a full overview, check out Markdown Text 101.
Formatting basics
There are a few native options available that will help you format your text. Let’s dive in straight away:
Header large (# Header large)
Header medium (# Header medium)
Header small (## Header small)
The headers are a more recent addition and great for any read-only channel that is meant to be read carefully. You can also include headers in announcements if you have a lot of news to cover.
- List (
* List)- Indented list (
* Indented list)
- Indented list (
Alternatively, you can use - instead of * . Lists were also recently added and it provides the ability to create bulleted lists with one level of indentation. Great for patch notes, rules and any other summaries.
- Italics
*Italics*(or_Italics_) - Bold
**Bold** - Bold italics
***Bold italics***(alternative:_**bold italics**_) - Underline
__Underline__(doesn’t seem to be supported by Lemmy)
Additionally, you can combine them like __*underline italics*__, __**underline bold**__ & __***underline bold italics***__. While they should be used sparingly, it can help emphasise certain elements of your text.
Quote
> Quote(use one>for each line break. If the quote is at the end of your message, you can use three to makeall following text quoted text ().
Code blocks (`Code blocks`) will prevent formatting, as you might have noticed in these guides.
If you want to do multiple lines in a single block, use three `'s at the start and end of the sentence like Multi-line code blocks (```Multi-line code blocks```). This creates a box filling the entire width of the chat window.
Timestamps
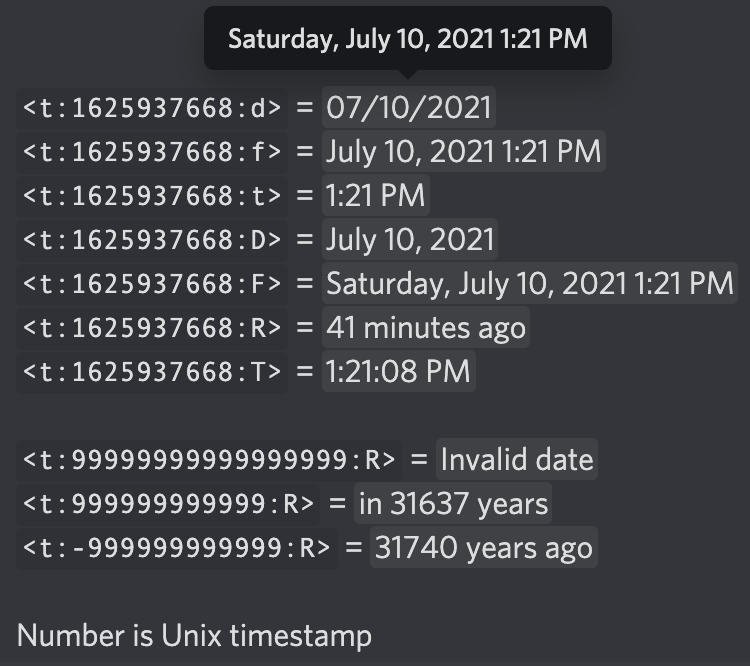
Timestamps can be used in Discord messages to include a date or time relative to the user’s timezone and regional settings. These timestamps are Unix Timestamps and are formatted like <t:1698591600:f>. Unless you know exactly how many seconds have passed since January 1st 1970, it’s best to use an online tool like this one to generate your timestamps.

You can use various formats to choose how much information you’re showing about the linked date and time as shown in the image above. This will mostly depend on the use case, like using the suffix :R> for a countdown and :f> or :F> for an event that starts around a certain time.
Embeds
Discord is able to embed information by pulling the image, title, description and/or author from a URL. While this can be fine most of the time, there are moments when you don’t want embedded information to show up.
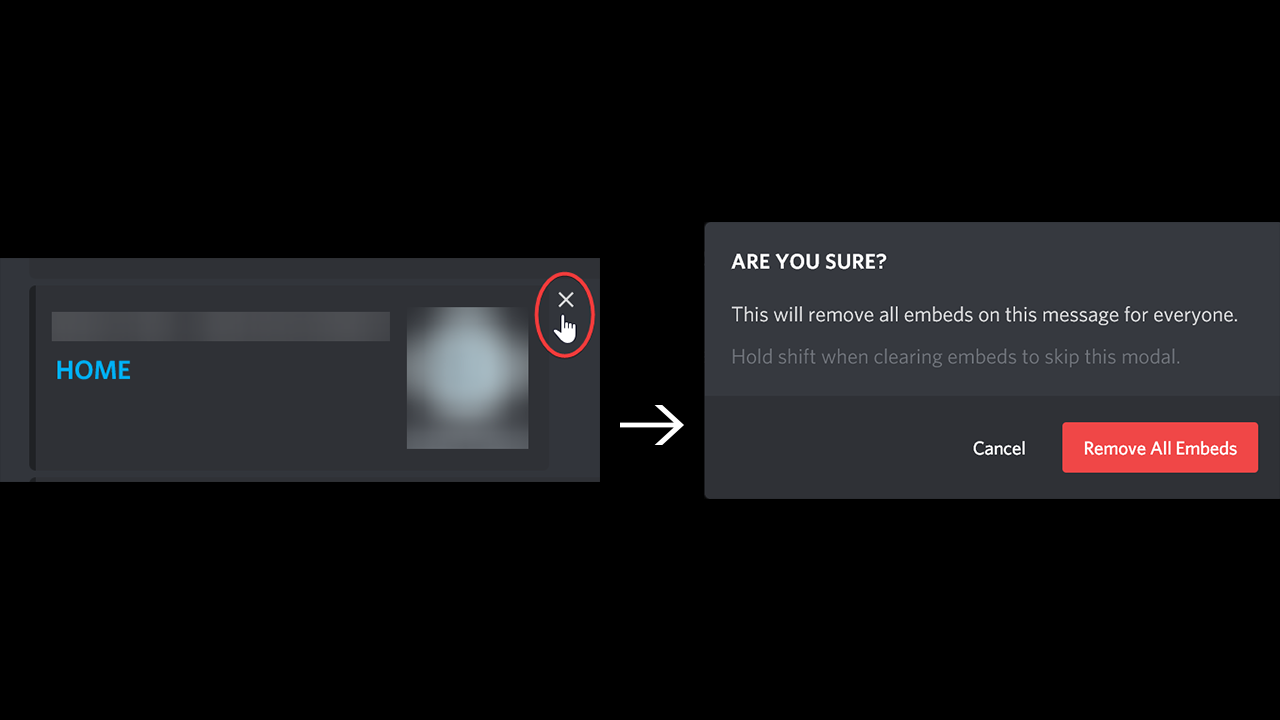
To prevent embeds from happening, you have two options. For singular links, the easiest way to prevent embedding is by enclosing the link with angle brackets, like this: <link> (or [](<link>) for masked links). If you have multiple links in your message and you want to get rid of all embeds you can simply click the “X” of any embed that is at the bottom of your message:

If you want specific embeds to go through, your only option is to use the brackets for the links you don’t want to appear. Social media posts, marketplace links and videos should be embedded as it increases interaction. People can view the embedded post without having to go away from Discord, making conversations easier.
Hyperlinks
Another recent addition is the ability to create hyperlinks. By using brackets and parentheses you have the ability to mask links. This is not only great for cleaning up links, but also a perfect tool to shorten long links for the reader. You can still manually disable embed cards by using the angle brackets [](<link>) or by clicking the X that appears below the message.
Forcing line breaks
Aside from text formatting and embedding, there are various tricks you can use to increase the readability of posts that will be read often. Because of the message character limit of 2000 (or 4000 with Nitro), it often is impossible to include everything in one single post in a read-only channel. But when posting multiple messages in a row or adding images between posts, you will find that separate messages have no line breaks between them, reducing the readability of a very important channel. You can’t start a new post with a line break either, as Discord automatically removes those.
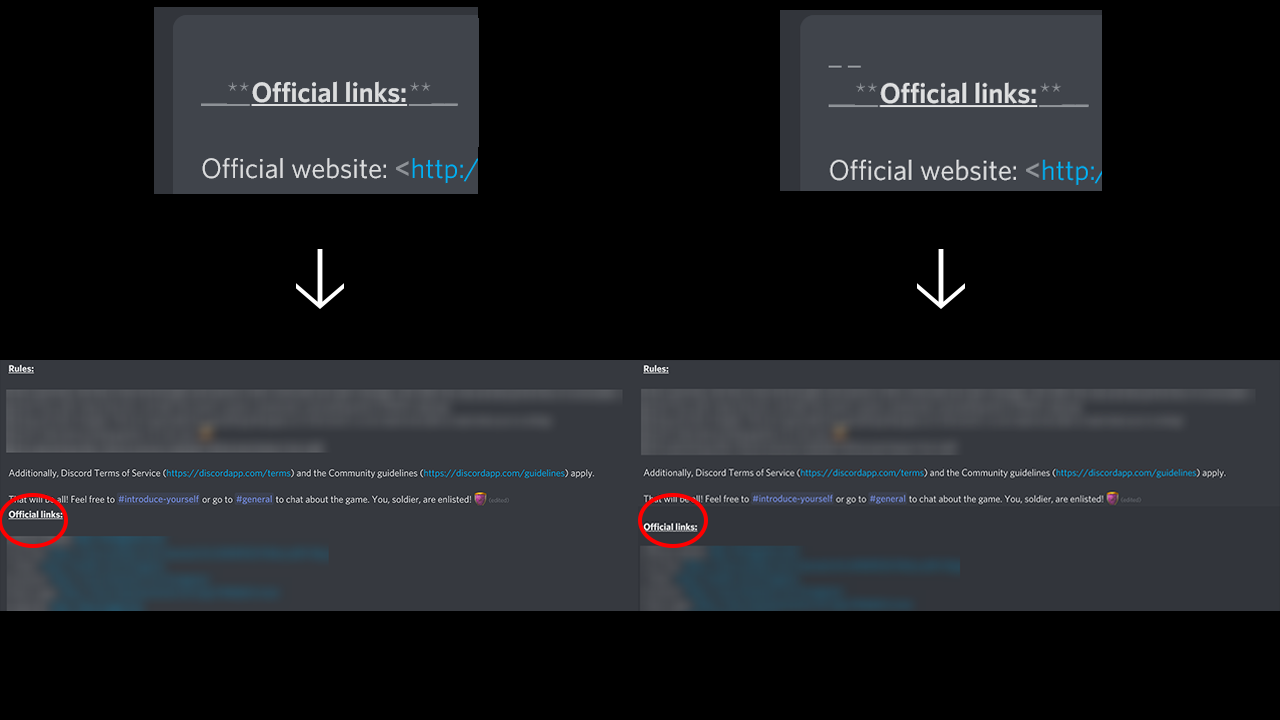
Luckily, there’s a simple workaround: force Markdown on a space ( ) by using underscores or asterisks (_ _ or * *). This forces Discord to render the space in italics even though it literally is just a space, and recognise it as a full line. See the image below to compare:

Using emoji
Next to conveying emotions and reactions with emoji, you can also use them for formatting purposes. You can have them be the bullet points of lists, icons for links or use them to put emphasis on certain words. Another helpful tool is to create an invisible emoji to resemble indentation. While we now have bulleted lists with one level of indentation, it might not prove enough if you want to build more sophisticated lists. Simply create a transparent image (128x128px is the basic canvas for emoji, I opted for 128x32px) that resembles the size of an indent and upload it as an emoji to use it with your post:
 👈 see the indent over here?
💡 Tip
Uploading formative emoji to your server will allow other users to use it too. With a Discord Nitro subscription you could opt to upload them to a private server, if you are more comfortable with that.
Using pins and @mentions
Pinning a message was an effective way to store information that is referenced often. Now with Onboarding, you can build resource pages for everyone to easily browse without having to manage pins. This makes pinning messages more applicable when the message refers to the channel the message is pinned in.
Where to pin messages
When you have channels for bug reports or feedback, it is quite useful to pin reminders that help users get started. A post explaining how to format a bug report or search for log files is a good example of information that you want accessible for everyone in high traffic channels.
If your post is in a read-only channel there is no need to pin it, especially if it’s the only post in that channel. No further chat will ever remove those message(s) from view, so pinning that only adds nothing but clutter. Speaking of clutter: you can delete the pin notification message (saying “… pinned a message to this channel. See all the pins.”) like any other message. If you really want to pin a message that users won’t be able to scroll past, at least remove the notification from the channel to keep it looking clean.
Lastly, I want to emphasize that as with many other aspects of Discord, less is more. For pins not to lose any meaning, use them sparingly as little nuggets of knowledge you can direct traffic to and your users can rely on. Additionally, nobody wants to read through twenty pins in a channel to figure out what they need to do or be reminded of. Consider creating a resource page with the Onboarding functionality. Be sure to regularly take a few minutes to check your pins to see if they are still relevant as well. Most of the times, they are very time-specific and could be outdated information.
When to use @everyone and @here
The @everyone mention should not be used lightly as a lot of notifications might provoke members to mute or even leave the server. I recommend to only use @everyone in messages that are relevant to the game or Discord community, and are of high importance. Even when members have muted the server suppressing notifications, this is the only @mention that will give them a red notification icon.
Bear in mind it’s very hard to get members to unmute your server if they decided it was too much. Try to assign roles based on notification interests and @mention those instead. This is beneficial to both of you: members are in control of what news they are subscribed to and you will be get insights on what people are interested in as well.
As for @here, it only pings online users that don’t have any idle status. This is helpful if you need anyone’s attention about something happening right now but will probably end in the near future, like a server outage or taking questions after a live presentation. Bear in mind that people who log in the day after still see the red notification, so if it’s no longer relevant be sure to communicate that part, too.
💡 Tip
If you want to link the role mention so bots and other pages on your Discord server can use it too, write the @mention like this: <@&RoleID>. For the Role ID go to the Roles setting of your server and right-click on the role that you want to @mention and select “Copy ID”. You can also do this for channels by writing <#ChannelID>. This makes hard-linking channels possible in embedded messages, too.
I realize Lemmy doesn’t really play nice with a bunch of formatting so I’ll have to revisit this later to see if I can fix the links and angle bracketsFormatting should look correct now! Thanks for the tip on Github, @[email protected]!

